
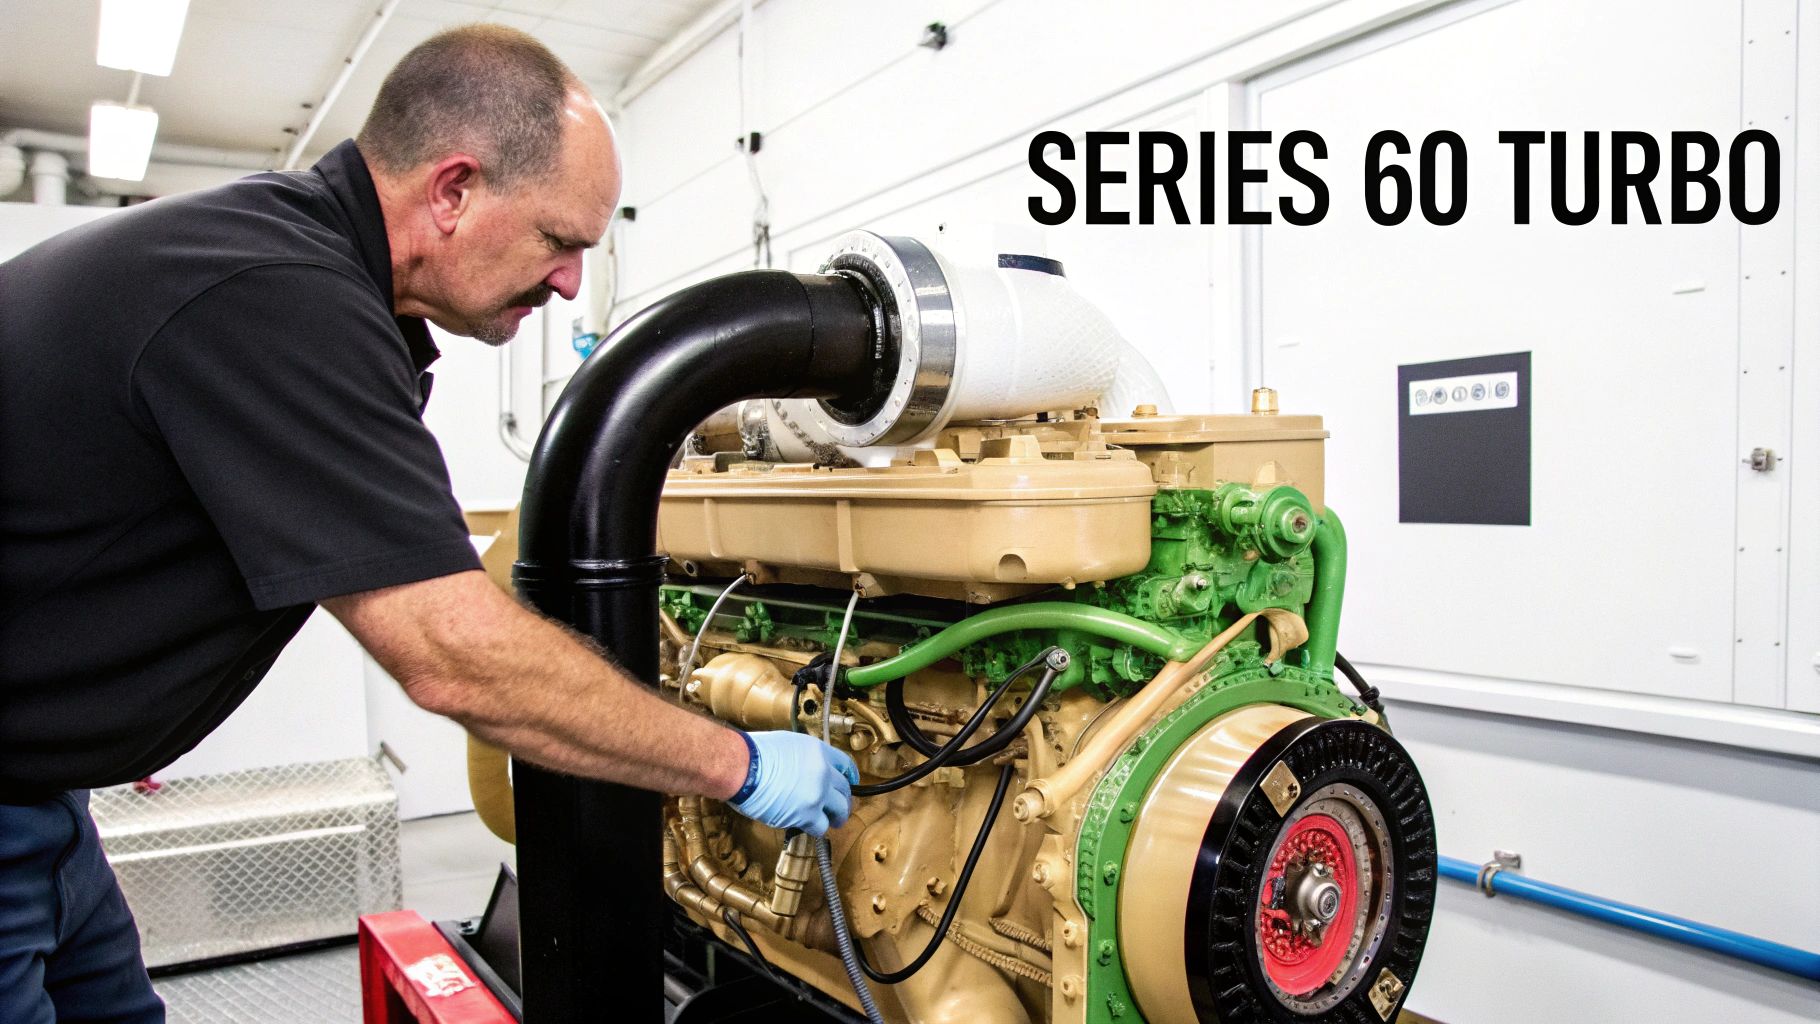
When you’re talking about a Detroit Diesel Series 60, you’re talking about an engine that’s built a legendary reputation on pure, unadulterated power and reliability. At the very heart of that power, especially in the unforgiving world of marine applications, is the turbocharger. It’s the component that transforms a solid engine into an absolute workhorse.
The turbo isn’t just about boosting horsepower; it’s about forcing in the dense, cool air that lets the engine breathe, burn fuel more efficiently, and deliver the torque you need when pushing through heavy seas.
When you’re facing a problem you can’t solve, getting a professional diagnosis is the quickest way to get a straight answer. The factory-certified technicians at GTM International offer mobile service throughout South Florida. For dependable inspections and repairs on your marine diesel, you can find us at https://www.marinetechsvcs.com.
Why The Turbo Is The Heart Of Marine Performance
In a tight engine room, the turbo’s health dictates nearly everything. It directly impacts your throttle response, your fuel burn, and ultimately, whether you have the power you need when you need it most. This isn’t just another part you can ignore until it fails. We’re talking about a precision-engineered piece of equipment spinning at incredible speeds and enduring punishing temperatures.
To properly service it, you first have to understand what you’re working with.
From Old-School Wastegates To Modern VGTs
The Series 60 has been around long enough to see a few different turbo philosophies. Knowing which one is sitting on your manifold is the first step in any diagnosis.
- Wastegated Turbos: These are the classic, no-nonsense units you’ll find on a ton of the original 12.7L engines. They use a simple, mechanically actuated valve—the wastegate—to bleed off excess exhaust pressure and regulate boost. They’re tough, reliable, and straightforward.
- Variable Geometry Turbos (VGT): As the engine evolved, especially with the 14L models, so did the turbo. VGTs use a sophisticated set of internal vanes that move to change the turbine housing’s geometry on the fly. This gives you incredibly sharp low-RPM response and a much wider, more efficient powerband.
The takeaway here is simple: a wastegated turbo is mechanically simpler, while a VGT is more complex but far more responsive. Your troubleshooting approach will be completely different depending on which Detroit Series 60 turbo you have.
A healthy turbo is the difference between a responsive, efficient vessel and one that struggles to get on plane, burns excessive fuel, and pours black smoke from the exhaust. It’s the single most important component for power generation after the engine itself.
A Legacy Of Smart Power
The Series 60 wasn’t just another diesel engine; it was a game-changer. When it hit the market in 1987, it was the first heavy-duty diesel with fully integrated electronic controls. This revolutionary system, the Detroit Diesel Electronic Control (DDEC), fine-tuned everything from injector timing to turbo boost.
That forward-thinking design is why these engines have earned a reputation for longevity that few others can match. You can dive deeper into the engine’s groundbreaking development to see just how ahead of its time it was. This history of innovation is why we’re still talking about—and working on—these dependable power plants today.
Series 60 Turbo Health At a Glance
Sometimes, you need a quick gut check. Use this quick reference to distinguish between a healthy turbo and one showing signs of failure, helping you make a fast and accurate assessment.
| Performance Indicator | Signs of a Healthy Turbocharger | Warning Signs of a Failing Turbo |
|---|---|---|
| Audible Sound | A smooth, consistent whistle that rises and falls with engine RPM. | Loud whining, grinding, or a siren-like noise. Any sudden change in sound is a red flag. |
| Power & Response | Crisp throttle response and strong, predictable power throughout the RPM range. | Sluggish acceleration, noticeable “turbo lag,” or a general lack of power under load. |
| Exhaust Smoke | Clean exhaust under normal operation; maybe a light puff of black on hard accel. | Continuous black smoke (over-fueling) or blue/white smoke (burning oil). |
| Oil Consumption | Minimal, consistent oil use between changes. | A sudden increase in oil consumption, often accompanied by oil leaks around the turbo housing. |
| Boost Gauge Readings | Stable, expected boost pressure that builds and holds steady under load. | Low boost, fluctuating or erratic readings, or a complete failure to build boost pressure. |
| Physical Inspection | Clean and dry housing. No visible cracks or oil residue. Shaft has minimal play. | Oil leaks, cracked housings, or significant radial/axial play in the compressor wheel shaft. |
This table isn’t a substitute for a full diagnostic, but it’s an excellent starting point. If you’re seeing multiple warning signs, it’s time to dig deeper.
How to Tell if Your Turbo is Actually the Problem
When your Series 60 starts to feel sluggish or lay down a smoke screen, it’s all too easy to point the finger at the turbo. But hold on before you start pulling out the credit card for a new one. More often than not, the symptoms of a bad turbo look an awful lot like problems with other, simpler components. A little methodical detective work can save you a world of hurt and a pile of cash.
Think of it this way: you’re gathering clues from what the engine is telling you through its behavior, sounds, and even its smoke signals. Rushing to a conclusion is the fastest way to waste a weekend in the engine room chasing your tail.
Reading the Smoke Signals
The color of the smoke billowing from your exhaust is your engine’s most direct way of telling you what’s wrong inside. Get this right, and you’re halfway to a solid diagnosis.
- Blue Smoke: This is the classic sign of burning oil. If you see a puff of blue on startup or when you back off the throttle, the turbo’s oil seals are the prime suspect. Worn seals in the center housing (the CHRA) are letting engine oil seep into the hot exhaust stream, where it burns off.
- Black Smoke: This is pure and simple: too much fuel, not enough air. Before you condemn the turbo, check the easy stuff first, like a clogged air filter or a boost leak somewhere in the system. If those are good to go, then a Detroit Series 60 turbo that’s just not spinning up and making enough boost is a very real possibility. The engine is starving for air and can’t burn its fuel cleanly.
- White Smoke: If you’re seeing thick, persistent white smoke, you’re likely looking at unburnt diesel fuel. This usually points to a bad injector or a deeper compression issue. It’s rarely a direct symptom of turbo failure, unless the turbo has suffered a complete and catastrophic internal meltdown.
The Hunt for Boost Leaks
A sudden loss of power, coupled with a plume of black smoke, screams “boost leak.” All that air your turbo worked so hard to compress is escaping before it ever reaches the cylinders, throwing your air-fuel ratio completely out of whack. Finding these leaks is usually pretty straightforward.
Start with a good visual inspection. Trace the plumbing all the way from the turbo’s compressor outlet to the intake manifold. Keep an eye out for loose clamps, cracked silicone boots, or tell-tale soot trails where pressurized air is making a break for it. A tiny split in a hose can yawn wide open under pressure.
For a more definitive test, you can rig up a simple, low-pressure leak tester. With the engine off, cap the system and introduce a bit of regulated shop air—no more than 15-20 PSI is all you need. You’ll often hear the hiss of escaping air right away. If it’s being sneaky, a spray bottle full of soapy water will make the leak show itself with a cascade of bubbles.
What a Failing Turbo Sounds and Feels Like
Sometimes, the best tools you have are your own ears and hands. A turbo on its way out will often give you plenty of warning signs long before it completely lets go.
That high-pitched, siren-like whine is the death song of a turbo bearing. It’s a sound you won’t mistake for anything else, and it gets louder and more piercing as the engine revs and the turbo spools. Don’t confuse this with the rhythmic puffing or hissing of a simple exhaust leak, which is usually more noticeable when the engine is cold.
The most critical hands-on check is for shaft play. Once the engine is cold and shut down, pull the intake hose off the compressor inlet. Grab the nut on the compressor wheel and give it a wiggle. A tiny bit of side-to-side (radial) play is perfectly normal. But if you feel any in-and-out (axial) movement, that’s a death sentence. It means the thrust bearing is shot, and a total failure isn’t far behind.
Putting It All Together for a Confident Diagnosis
The 12.7L Detroit Series 60 turbo built its reputation on being nearly bulletproof, with countless engines logging over a million miles with just basic maintenance. But even these legendary workhorses aren’t perfect. The DDEC electronic controls were a game-changer for efficiency, but on later models, a bad turbo sensor can perfectly mimic the symptoms of a complete mechanical failure. This is exactly why a thorough check-up is so crucial before you start unbolting expensive parts. You can learn more about the engine’s impressive specs and history to see why they earned such a loyal following.
By piecing together all the clues—the smoke color, boost gauge readings, strange noises, and that physical shaft check—you can build a clear picture of what’s really going on. This methodical approach will tell you with certainty whether the Detroit Series 60 turbo is the villain or if the problem is something much simpler, like a sensor, a filter, or an injector. In any repair, getting the diagnosis right is more than half the battle.
Getting Your Hands Dirty: The Turbo Swap
Alright, you’ve done the diagnostic work and the verdict is in: it’s time for a new turbo. Now, we switch gears from detective to surgeon. Replacing the turbo on a Detroit Series 60, especially in the cramped quarters of an engine room, is all about being meticulous. If you rush this job, you’re asking for stripped bolts, oil everywhere, and a problem that’s ten times worse than when you started.
First things first: safety. Lock out and tag out that engine. Kill the battery supply so there’s zero chance of an accidental crank. Get your workspace ready for the inevitable mess—have drain pans and a healthy supply of absorbent pads on hand for the oil and coolant you’re about to release.
Prepping for Removal
A methodical approach here will save you a world of hurt. Think of it like taking apart a delicate piece of machinery—because you are. The very first thing I do is hit all the turbo mounting nuts and the exhaust clamp bolts with a good penetrating oil. Don’t be shy with it. Let it soak in and do its job; this single step is often the difference between a nut coming off smoothly and a stud snapping right off the manifold.
While that’s working, you can start clearing the way.
- Air Piping: Get the intake and charge air cooler piping out of your way. Loosen the clamps on the hose from the air filter and the pipe heading to the cooler, then give them a good wiggle to break them free.
- Exhaust: That V-band clamp holding the exhaust downpipe can be a real bear. Once you’ve backed the nut off, a few persuasive taps with a rubber mallet usually convince it to let go.
- Coolant Lines: Not every Series 60 turbo is water-cooled, but if yours is, you’ll see two small coolant lines. Pinch them off before you disconnect them to minimize the spill.
With that clutter gone, you finally have a clear shot at the most critical parts: the oil lines.
Dealing with the Oil Feed and Drain
The oil lines are the turbo’s lifeline. The supply line is a high-pressure feed, and the drain is a larger, gravity-fed tube. One of the most common and costly mistakes I see is people damaging these lines during removal.
For the oil supply fitting, always use a line wrench or two opposing wrenches. This keeps you from twisting and kinking the line itself. As soon as it’s loose, cap it. Don’t let a single piece of grit get in there. The oil drain is usually simpler, held on by two bolts. The gasket, however, can be baked on pretty good. Don’t even think about reusing it; have a new one ready to go.
A Pro’s Insight: Before you move on, take a hard look at the lines you just removed. Is the supply line kinked? It’ll starve the new turbo and kill it instantly. Is the drain line caked with black sludge? That points to bigger engine health problems you need to investigate.
Now for the main event. You should be able to reach the four nuts holding the turbo to the exhaust manifold. A long extension and a solid six-point socket are your best friends here. Once those nuts are off, the turbo is free. Brace yourself—it’s heavier and more awkward than it looks. Get a solid grip before you try to lift it off the studs.
This entire removal process is the final act that follows a careful diagnosis. This flowchart shows the kind of thinking that should happen before you ever pick up a wrench.
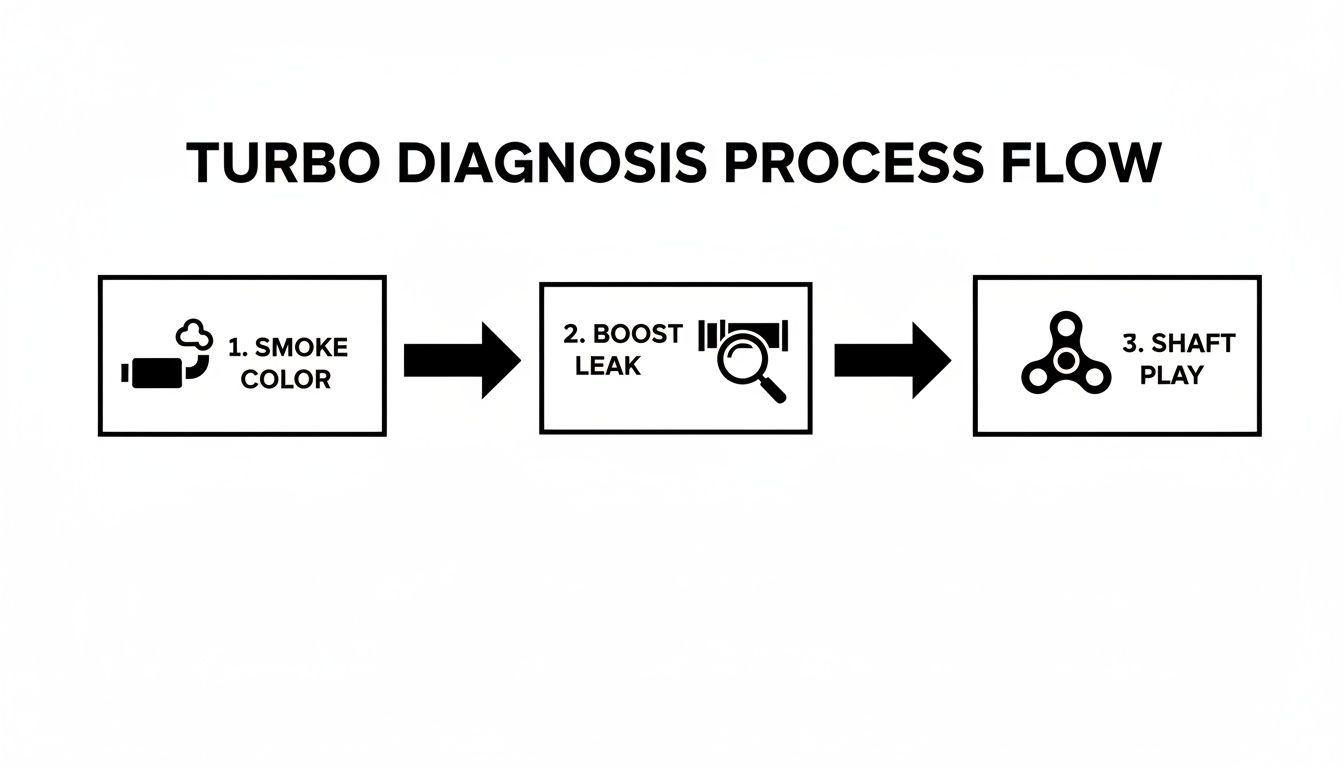
As you can see, breaking out the tools is what you do after you’ve already analyzed the smoke, checked for leaks, and felt for shaft play.
The Art of a Clean Installation
Putting the new turbo on requires more care than taking the old one off. This is where precision really counts. Your first and most critical step is to pre-lube the new unit. Never, ever install a turbo dry.
Pour fresh engine oil right into the oil supply port on the turbo’s center housing. As you pour, slowly spin the compressor wheel with your fingers. You’ll feel the bearings get silky smooth as the oil works its way in. This simple step gives the bearings a fighting chance in the first few seconds of startup before oil pressure fully builds.
Next, get that manifold flange perfectly clean. Scrape off every last bit of the old gasket. You need a clean, flat surface for a perfect seal.
- Mount the Turbo: Start with a brand-new manifold gasket. Don’t cheap out here. Carefully slide the new turbo onto the manifold studs.
- Snug the Hardware: Thread the new nuts on and tighten them down by hand.
- Torque it Right: This isn’t a “good-n-tight” situation. Use a torque wrench and follow the factory crisscross pattern. This pulls the turbo down evenly and prevents exhaust leaks or a warped flange down the road.
With the turbo mounted, it’s time to reconnect everything. Use a new gasket for the oil drain and new sealing washers for the oil supply line. Reinstall the exhaust, intake, and charge air piping, making sure every single clamp is tight. Go back and put a wrench on every connection you touched. A loose clamp is an instant boost leak.
Here’s the final, crucial step. Before you fire it up, disable the fuel (the shutoff solenoid is easiest). Now, crank the engine over for 15-20 seconds. You’ll see oil pressure come up on the gauge. This primes the entire system and pushes fresh oil through the new turbo before it spins at thousands of RPM. This one little trick can literally double the life of your new turbo.
Essential Tools, Torque Specs, and Best Practices

A successful turbo swap all comes down to the details. Anyone can muscle the big parts off and on, but it’s the precision work—using the right tools and sticking to non-negotiable best practices—that separates a temporary patch from a lasting, reliable repair. Get this right the first time, and you won’t be doing the same job twice six months down the line.
Think of it this way: you can quickly assemble a piece of furniture, or you can build it to last a lifetime. One approach just gets it done; the other ensures it can handle years of abuse. The same exact principle applies in the high-stress, high-heat environment of your engine room.
Arming Yourself for the Job
Don’t even think about walking into this job with just a basic socket set. That’s a surefire recipe for frustration, busted knuckles, and stripped bolts. You absolutely need a few specific items to tackle the unique challenges of a Detroit Series 60 turbo replacement, especially when you’re up against high-heat fasteners and delicate fluid lines.
Here’s a practical checklist of what you should have laid out before you even turn the first wrench:
- Deep-Well Sockets (Metric): Standard sockets just won’t cut it. They can’t reach the nuts on the manifold studs, so a quality deep-well set is essential to get a solid, confident grip.
- Torque Wrench: This is not optional, it’s mandatory. Proper torque is the only thing preventing stripped threads, warped flanges, and dangerous exhaust leaks. A reliable click-style or digital wrench is one of the most important tools for this job.
- Line Wrenches (Flare Nut Wrenches): Trying to use a standard open-ended wrench on the oil supply line fitting is the fastest way to round it off and create a much bigger problem. A line wrench grips the fitting on multiple sides, preventing damage.
- Universal Joint/Swivel Socket: Access to some of the manifold nuts can be brutally tight. A swivel gives you just enough angle to apply torque correctly without stripping the hardware.
- Gasket Scraper: A clean mounting surface is absolutely critical for a good seal. A sharp, sturdy scraper will get every last trace of that old, baked-on manifold gasket off the block.
Having these specific tools ready to go transforms a potential struggle into a smooth, professional-grade repair.
Critical Torque Specs for Series 60 Turbo Replacement
Guesswork has no place when you’re tightening down a turbo. Go too tight, and you can warp the turbo flange. Go too loose, and you’re guaranteed a screaming exhaust leak. You must use a calibrated torque wrench and stick to the book.
This table gives you the most important torque values for a standard 12.7L or 14L Series 60 engine.
| Component | Torque Specification (lb-ft) | Additional Notes |
|---|---|---|
| Turbo to Manifold Nuts | 40-45 lb-ft | Use new nuts and a high-temp anti-seize compound. Tighten in a crisscross pattern. |
| Oil Drain Tube Bolts | 15-20 lb-ft | Always use a new gasket. Ensure the flange surfaces are perfectly clean before install. |
| Oil Supply Line Fitting | 20-25 lb-ft | Use a line wrench to avoid rounding the fitting. Do not overtighten this sensitive line. |
| Exhaust Downpipe V-Band Clamp | 8-10 lb-ft | Ensure the clamp is seated evenly. Tapping it with a mallet can help it align properly. |
| Charge Air Cooler Clamps | 7-9 lb-ft | These are often over-tightened, which can damage the silicone boots. Snug is enough. |
Remembering these figures in the heat of the moment isn’t easy, so make sure you follow the specs to the letter.
Pro Tip: Print this table out or save a screenshot on your phone. Having these numbers right there in the engine room eliminates any temptation to just “get it tight enough” and ensures every connection is secure and leak-free.
Best Practices That Make All the Difference
Beyond the right tools and torque specs, a few key habits elevate the quality of your work from good to great. These are the steps that experienced marine mechanics swear by, because they prevent the most common—and most costly—post-installation failures.
The Great Debris Hunt
When a turbo lets go, it often grenades itself, sending tiny metal fragments flying through the entire intake system. If you just slap a new turbo on without cleaning that out, you’re basically feeding shrapnel directly into your brand-new unit, destroying it instantly. You have to remove and thoroughly clean all the charge air piping, the intercooler, and the intake manifold. No exceptions.
Mandatory Oil and Filter Change
The old turbo contaminated the engine oil with microscopic metal particles. Leaving that oil in the engine is like pumping liquid sandpaper through your brand-new turbo’s delicate bearings. A complete oil and filter change after the new turbo is installed is non-negotiable for ensuring a long service life.
OEM vs. Quality Remanufactured
While a genuine OEM Detroit Series 60 turbo offers ultimate peace of mind, a high-quality remanufactured unit from a reputable supplier can provide excellent value without compromising on reliability. The key word here is “reputable.” Avoid those no-name online specials like the plague and choose a supplier that provides a solid warranty and has a proven track record. It’s a smart way to manage costs without gambling on your engine’s health.
Final Checks and Sidestepping Costly Mistakes
Getting the new turbo mounted and torqued down feels like the finish line, but don’t pop the champagne just yet. Your work isn’t over. This final phase—the initial startup and verification checks—is what separates a successful, long-lasting repair from a premature failure that sends you right back to square one.
Rushing these last few steps is a classic rookie mistake, and it can undo all your hard work in a matter of seconds. The moments right after installation are when your new Detroit Series 60 turbo is at its most vulnerable. How you handle this initial startup directly impacts its lifespan, so it’s all about being patient, methodical, and knowing exactly what to look for.
The Critical First Run
Before you even think about turning the key for a full start, you have one critical job: get oil to the bearings. We primed the turbo itself during installation, but that oil feed line is still full of air. This is where the “no-fuel crank” comes in.
Disable the fuel and crank the engine for a solid 15-20 seconds. This lets the oil pump build pressure and push a steady stream of lubricant through the feed line, purging the air and bathing the turbo’s center housing in fresh oil. It’s a simple, often-skipped step that prevents the catastrophic damage of a dry start, where bearings spin at thousands of RPM with zero lubrication.
Once you’ve done that, re-enable the fuel and fire up the engine. Let it idle. Don’t touch that throttle. Just let it settle in for a few minutes while you perform your first round of inspections. Your job now is to use your eyes, ears, and even your nose to spot any signs of trouble.
The Four-Point Leak Inspection
With the engine humming at idle, it’s time to hunt for leaks. Even the smallest drip can become a major headache out on the water. Grab a good flashlight and methodically check these four critical areas:
- Engine Oil: Get your eyes on the new gaskets at the oil supply and drain lines. Check every fitting for the slightest hint of seepage. A tiny oil leak here will only get worse under heat and pressure.
- Engine Coolant: For water-cooled turbos, give both coolant line connections a thorough look. A small coolant leak can introduce air into the system and lead to localized overheating.
- Exhaust: Carefully run your hand near the manifold flange and the V-band clamp on the downpipe. Can you feel any puffs of hot air? Listen for any hissing or ticking sounds that scream “leak.”
- Boost Pressure: You can’t see a boost leak at idle, but you can double-check your work. Give all the charge air cooler clamps a final check for tightness and make sure the silicone boots are seated perfectly.
A single drop of oil or a faint wisp of exhaust is a red flag. Shut it down and fix it now. Ignoring a small leak is one of the most common ways a good job goes bad, leading to anything from oil starvation and fire hazards to a serious loss of performance.
Common Mistakes That Will Cost You Dearly
I’ve seen the same mistakes pop up time and time again over the years. These aren’t just minor missteps; they’re the direct causes of repeat failures. Avoiding them is every bit as important as torquing the bolts correctly.
Forgetting to Find the Root Cause
That old turbo didn’t just die of old age. It was a symptom. Maybe it was oil contamination, a persistent boost leak that forced it to overspeed, or excessive EGTs. If you didn’t identify and fix that original problem, you’ve just installed a brand-new turbo that is destined to suffer the exact same fate.
Reusing Old Gaskets and Seals
This is a cardinal sin of engine repair. Old gaskets are heat-cycled, compressed, and brittle. They will not seal properly a second time, period. Always use the complete, high-quality gasket and seal kit that comes with your new Detroit Series 60 turbo. The few dollars you might “save” by reusing old hardware are not worth the massive leak you’re practically guaranteeing yourself.
Ignoring the VGT Actuator Connection
On later model engines with Variable Geometry Turbos (VGT), botching the electronic actuator connection or calibration is a frequent and expensive error. A misaligned or poorly connected actuator can cause the internal vanes to stick, leading to either zero boost or a dangerous over-boost condition that can wreck an engine. Always follow the manufacturer’s specific instructions for VGT actuator setup to the letter.
If you’re ever in doubt about these more technical steps, getting your engine serviced by a factory-certified provider like GTM International is the surest way to avoid these pitfalls.
Answering Your Top Questions About the Detroit Series 60 Turbo
When you’re running a workhorse like the Series 60, questions usually come from a good place: wanting to keep that legendary reliability intact. Let’s get straight to the most common things we hear from marine operators in the engine room.
What Are The First Signs My Series 60 Turbo Is Failing?
The first hints of turbo trouble are usually things you feel or hear. You might notice the boat feels a bit sluggish on throttle-up, or you could start hearing a high-pitched, siren-like whine from the engine that definitely wasn’t there last week.
Keep an eye on your exhaust, too. Blue smoke is a dead giveaway that oil is getting past the turbo seals and burning off. If you’re seeing excessive black smoke, that often points to a lack of boost, which means you’re dumping too much unburnt fuel. Either one of these is a clear signal to shut down and take a closer look.
Trust your ears. That new, high-pitched whine is the classic sound of a turbo bearing on its way out. It’s the engine’s way of telling you to investigate now before a small problem turns into a complete failure at the worst possible time.
Can I Upgrade The Turbo On My Marine Detroit Series 60?
It’s a tempting thought, but for marine applications, reliability trumps raw power every time. While you can bolt on a bigger turbo, you’re opening a can of worms. A larger unit can introduce significant turbo lag, spike your exhaust gas temperatures (EGTs), and throw the DDEC programming completely out of whack.
Honestly, unless you’re working hand-in-hand with a marine performance specialist who can remap the entire fuel system to match, you’re far better off sticking with a quality OEM-spec turbo. It’s the proven path for long-term dependability out on the water.
How Often Should I Inspect My Marine Turbocharger?
A little proactive maintenance goes a long way in preventing catastrophic failure and costly downtime. I always recommend a two-part approach to my clients:
- During Pre-Departure Checks: Every time you’re in the engine room, give the turbo a quick visual once-over. Look for any new soot streaks or oily residue around the housing and connections. It only takes a second.
- At Every Major Service: When you’re doing your regular oil and filter changes, roughly every 250-500 operating hours, it’s time for a hands-on check. Pull the intake piping off and physically feel the shaft. Check for any side-to-side or in-and-out play. Give the compressor and turbine wheels a good look for any signs of chipping, bent fins, or housing contact.
This simple routine is the single best way to catch a problem in its early stages, saving you a world of headaches and expense down the road.